Appointment Summaries let you document information about a specific student appointment, whether the appointment was scheduled, a drop-in, or the student was a no-show. Access to Appointment Summaries can be limited to your specific Care Unit and are is based on your user role permissions.
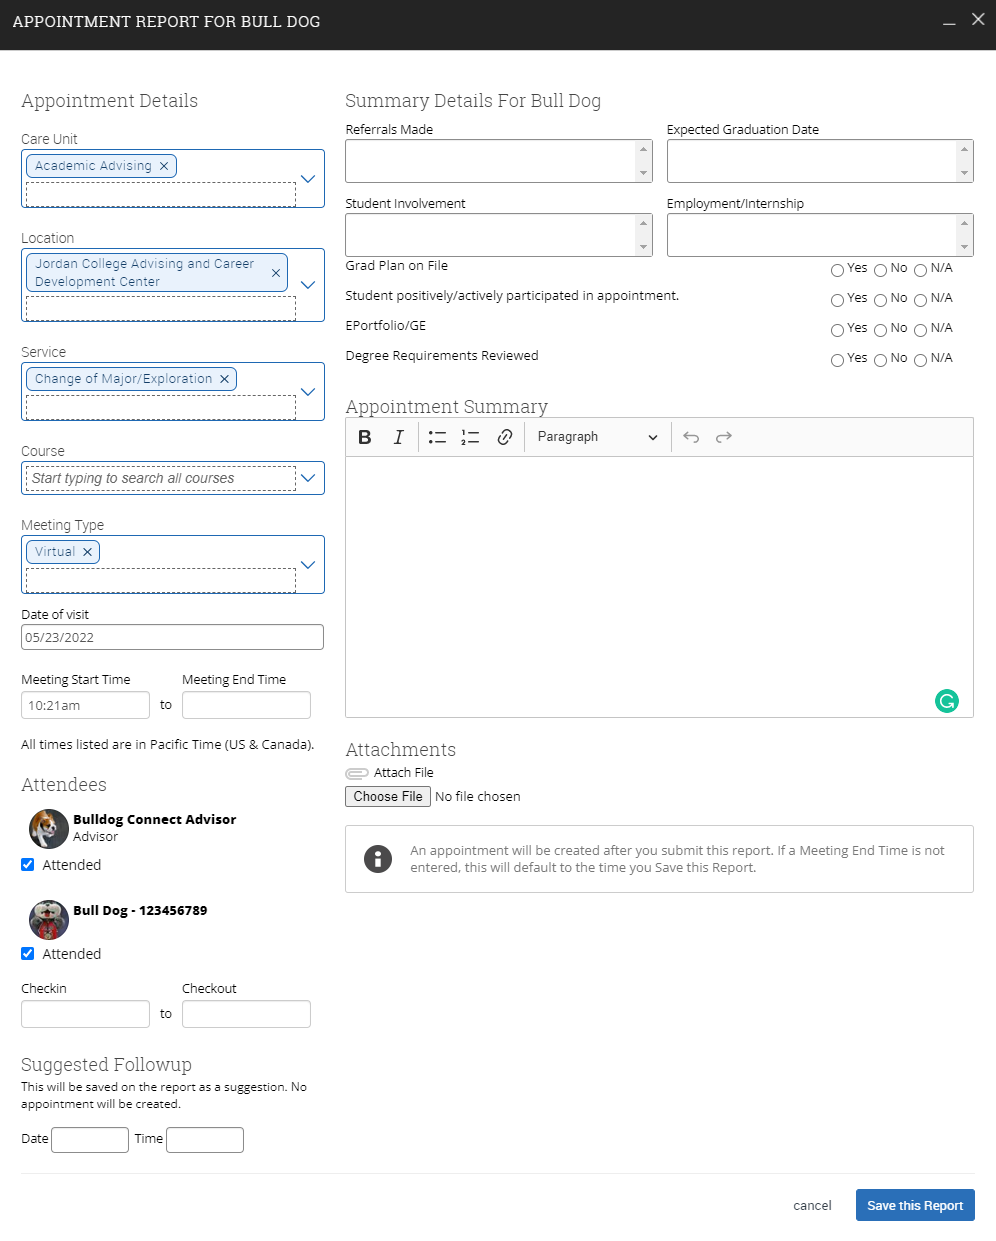
The appointment summary details section has several short response text boxes and Yes/No/NA questions that may or may not be applicable to the appointment. If these predefined prompts are not applicable or are too generic for the appointment, it is perfectly acceptable to leave them blank.
| Expand | ||
|---|---|---|
| ||
 |
| Warning |
|---|
Warning. Any information you enter into the platform pertaining to a student becomes a part of their official student record and may be subpoenaed by that student, as outlined in the Family Educational Rights and Privacy Act (FERPA). |
Creating Appointment Summary Reports
Create Appointment Summary Reports during or after meeting with students. You can add a summary report to an appointment scheduled in advance, create a summary report for a drop-in appointment, mark a student as a no-show, or edit existing summary reports.
Adding Appointment Summary
From the Appointments Tab
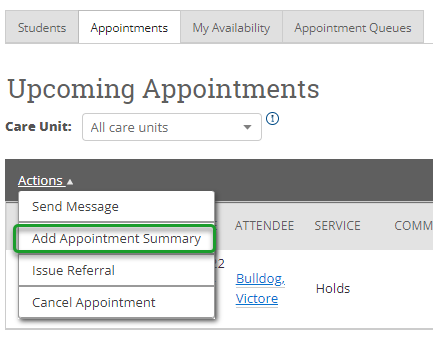
With a single row checked (or multiple for group appointments), click on the Actions menu and select the Add Appointment Summary option.
A new overlay window will open with most appointment details pre-filled and space to include appointment summary information. Once the report is filled out and ready to be submitted, click on the Save Report button at the bottom of the overlay.
For Scheduled Appointments
To add an Appointment Summary for a past scheduled appointment, open the Staff Home and click on the Appointments tab. Find your Recent Appointments table. Select a student and choose Add Appointment Summary from the Actions menu. You can also access this section from the Staff Home Appointments tab.
Note. Always create Appointment Summary Reports from the scheduled appointment itself, rather than ad-hoc, to ensure the Appointment Summary Report is tied to that specific appointment.
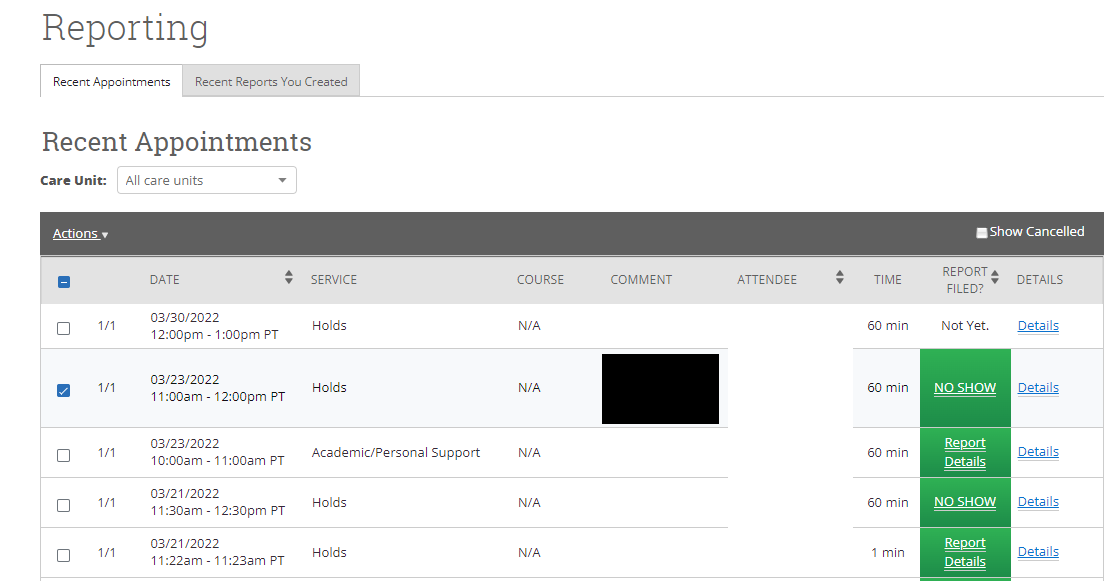
Appointments that are considered completed will show with a Report Filed status in green, indicating that either the appointment has Report Details associated or the appointment was a No-Show. If an appointment has no report, the Report Filed field will show as Not Yet.
| Note |
|---|
Warning. Any appointments that are in the past 90 days will be shown in the Recent Appointments tab under the Reporting section. |
For any recent appointment without a report already filed, staff can select the appropriate checkbox on the appointment row and use the actions menu to complete certain tasks.
Appointments Queues Tab
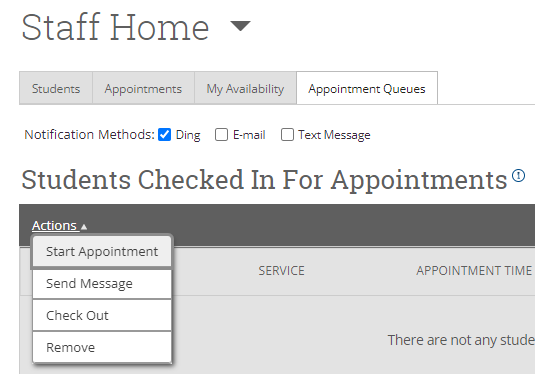
You can add an appointment summary report to an appointment in progress from the Staff Home Appointment Queues tab. The Students Checked in for Appointments table lets you select a student who has arrived for their scheduled appointment and choose Start Appointment from the Actions menu. This opens an Appointment Summary Report. If you wish to view other information on the platform while the appointment progresses, minimize the dialog and return later.

For Drop-In Appointments
There are several different ways to create an ad-hoc Appointment Summary Report for drop-in appointments. Create Appointment Summary is an option in the Actions menu throughout Bulldog Connect. The easiest way to create an ad-hoc Appointment Summary Report for a drop-in appointment is from Staff Home or a student profile. Find the specific student in your My Assigned Students table, or open the dropdown menu to find the student from one of your saved lists. From this section, you can select a student and select Create Appointment Summary from the Actions menu. This creates an Appointment Summary Report and this will add the appointment to your calendar in the past.

You can also add a summary report to a drop-in student appointment from the Staff Home Appointment Queues tab. The Students Checked In For Drop-Ins With Me table lets you select a student who has dropped into your specific queue and select Start Appointment from the Actions menu.
This opens an Appointment Summary Report. If you want to view other information on the platform while the appointment progresses, minimize the dialog and return later.
From the Student Profile page
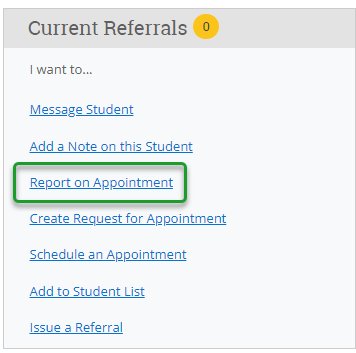
You can also create an ad-hoc Appointment Summary Report from a Student Profile. Open the Student Profile. Select Report on Appointment from the panel on the right. This creates an Appointment Summary Report and adds that appointment to your calendar in the past.
Note. When creating an ad-hoc Appointment Summary Report to track drop-in appointments, Bulldog Connect created the relevant appointment on your calendar for the date and time you selected in the past.
Creating an ad-hoc Appointment Summary Report helps our system keep track of all appointments happening with students, regardless of whether they were scheduled or drop-ins. If you sync your professional calendar to Bulldog Connect, this appointment created in the past will also sync to that calendar.
For No-Show Appointments
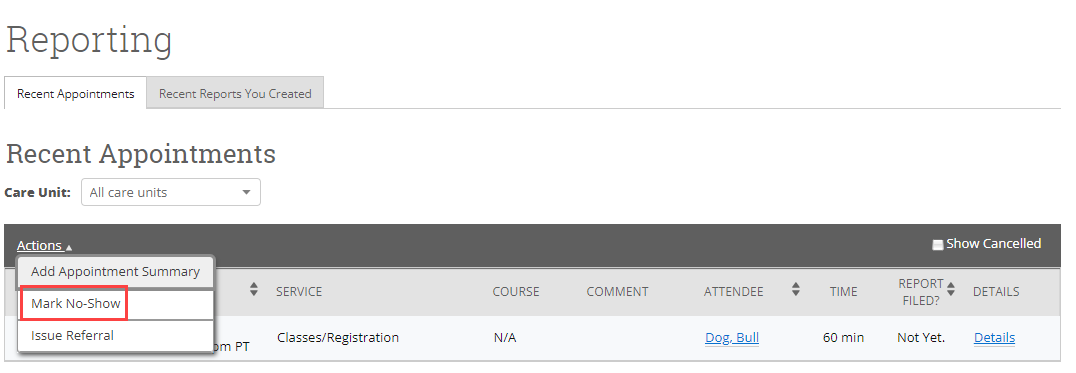
The primary way to mark a student as a no-show for a scheduled appointment is from the Staff Home Students tab. Find your Recent Appointments table. Select the student and choose Mark No-Show from the Actions menu.
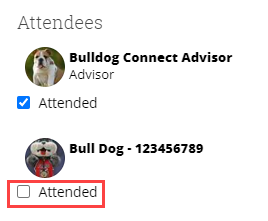
Marking a student as a no-show still adds an Appointment Summary Report. The only difference is that the box next to the student’s name called Attended is not checked.
Anatomy of an Appointment Summary Report
Appointment Summary Reports should only include information related to that specific appointment.
| Expand | ||
|---|---|---|
| ||
Note. The course should populate on the report automatically if the appointment was scheduled for a course or the student dropped in for a specific course.
|
In addition, the Appointment Summary Report dialog expands and takes up your entire browser. If at any time you wish to minimize the report and return to complete it later, select the minimize button in the report.
Saving the Report for Later
If a report requires more time to complete, staff can minimize the report and return to it later. Minimized reports will save a draft of what has already been entered. Find minimized reports under the icon at the top left of the page, below the Bulldog Connect header:

You can access minimized dialog from the top bar in Bulldog Connect.
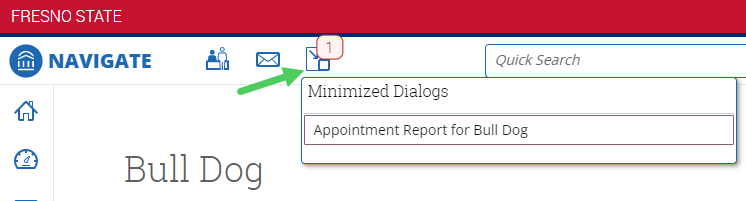
Clicking on a minimized dialog in this list will re-open the overlay and allow you to continue the report.
Frequently Asked Questions
| Expand | ||
|---|---|---|
| ||
We previously used Arrived and Departed fields for both the organizer and the student in Appointment Summaries. We received feedback that it was confusing to users to have both and was incorrectly populating check-in times in some cases. We have addressed this by replacing these fields with Meeting Start and Meeting End fields as well as student Checkin and Checkout fields to the report. This will not only affect filling out Appointment Summary Reports, it will affect all Care Units reports that rely on these fields. The underlying logic works as follows, depending on how the Summary Report was created. If the user creates an ad-hoc Summary Report (rather than creating the Summary Report based on an existing Appointment or Visit):
If the user creates a Summary Report for a Drop-in Visit:
If the user creates a Summary Report for a Scheduled Appointment:
|
| Expand | ||
|---|---|---|
| ||
If an appointment has been scheduled through the Bulldog Connect platform, it is important to file the Summary Report from this specific appointment in order to link them together. When you are creating a summary report for a drop-in appointment (i.e., a student appointment that was not scheduled in advance), you will need to create an ad-hoc summary report by following the instructions in this article. Creating an ad-hoc summary report will create a corresponding appointment on your calendar. |
| Expand | ||
|---|---|---|
| ||
No! When you create an ad-hoc summary report, the platform creates a corresponding appointment on your calendar in the past. If you create ad-hoc summary reports for already scheduled appointments, you are essentially scheduling this appointment twice. Double-counting appointments will significantly skew the reporting data in the platform and make it more difficult to review your past appointments. If your appointment was scheduled in advance, you should only be adding Summary Reports to that appointment, rather than creating an ad-hoc report. |
| Expand | ||
|---|---|---|
| ||
Yes! Any information you enter into the platform pertaining to a student becomes a part of their official student record and may be subpoenaed by that student, as outlined in the Family Educational Rights and Privacy Act (FERPA). |
| Expand | ||
|---|---|---|
| ||
Only services associated with your selected Location will display as options for your summary reports. If you have questions related to the services you see displayed, please contact your Application Administrator or try selecting a different Location. |
| Expand | ||
|---|---|---|
| ||
No, the Suggested Follow-up field is informational only and will take no action on your calendar. Use it simply for suggested notes to yourself about when you would like to follow up with the student. You can easily view your suggested follow-up dates by navigating to the “Students” tab on your staff homepage, scrolling down, and clicking on the “Recent Reports You Created” tab. This section includes all recent summary reports you filed, with a “Yes” indicated for suggested follow-up – hover over the Yes to view the date. Please see the screenshot below. 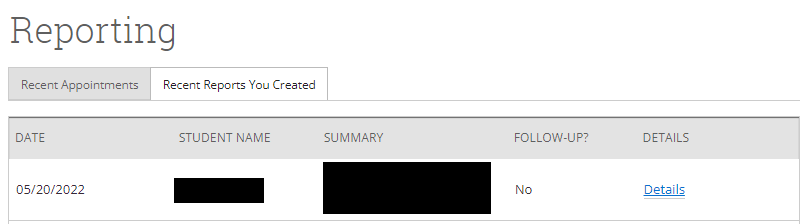 |
| Expand | ||
|---|---|---|
| ||
Not at this time. |
| Expand | ||
|---|---|---|
| ||
No, it will be visible to those with permissions to view the summary report, including those within your Care Unit, and including students if your institution has configured them to be visible to students. |
| Expand | ||
|---|---|---|
| ||
No, there is no ongoing record of changes to summary reports available. You will always view the most up-to-date version of the summary report. |
| Expand | ||
|---|---|---|
| ||
10 MB is the size limit for document attachments. |
| Expand | ||
|---|---|---|
| ||
Yes. |