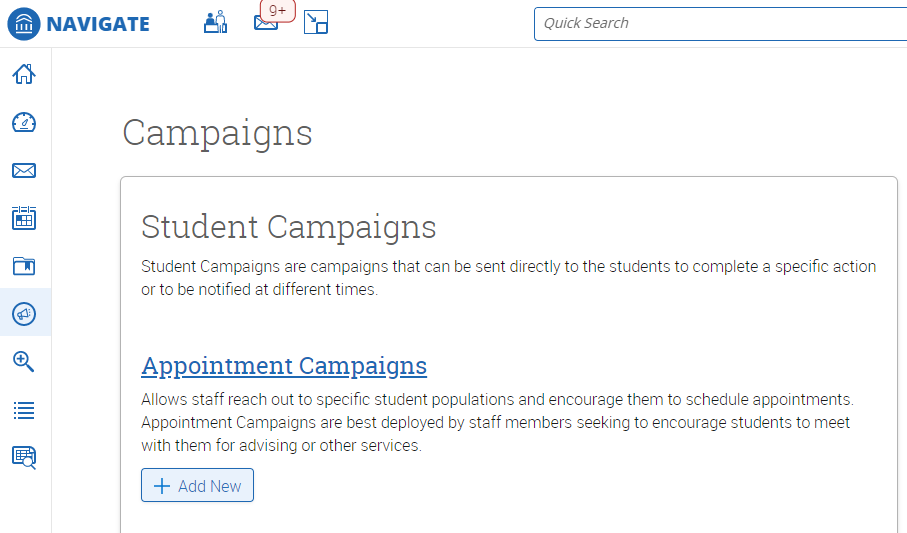
Appointment Campaigns let staff reach out to specific student populations and encourage them to schedule appointments. This tool is used when you identify a population of students who need extra support and send them a request to schedule an appointment with you.
You can access Appointment Campaigns via the Quick Links section of the Staff Home page or by opening the Campaigns page by clicking the Campaigns icon on the blue navigation bar. Appointment Campaigns are best employed by staff members seeking to encourage students to meet with them for advising or other services.
In order for Appointment Campaigns to work successfully, you must have both calendar sync and availability set up, as well as have the ability to create appointment campaigns. You also need to have access to Advanced Search to create a list of students for your campaign.
| Tip |
|---|
Reminder. When blocking time on your Google Calendar show the time as “Free” instead of the default busy. If an event is marked as busy then students will now be able to schedule a time in that slot. |
Launching an Appointment Campaign
For a successful campaign, a few pieces of information are needed:
Campaign Goal | Campaigns are great for targeted outreach to a known cohort of students to elicit the scheduling of one or more appointments for a specific reason. Anything other than this format can lead to the campaign being less effective, ineffective, or worse, confusing. |
Student Cohort | Who is targeted by this campaign? You can always add or remove students from a campaign, even after sending it, but starting with a clean list is important. |
Staff Organizers | Which staff will be included in the campaign for scheduling? Remember that any staff included will be schedulable by any students in the same campaign |
Custom Messages | Part of the campaign is an initial invitation that can be customized, including basic formatting. Additional “nudges,” or reminder emails, can be scheduled to send to any students that have yet to complete their campaign participation. |
Campaign Settings | What’s the name of the campaign, location, and service, the start and end dates, etc.? |
Campaign Setup
To begin, open the Campaigns page and select Add New from the Appointment Campaigns section.
Define the Campaign
The New Invitation Campaign page opens. Now you set the criteria for the Appointment Campaign. The fields that must be filled out are listed and defined below.
Note. If other staff are going to be included on this campaign, the reason/location/date range must align with Campaign Availability for the advisors that are going to be included in the campaign if you want them to be available.
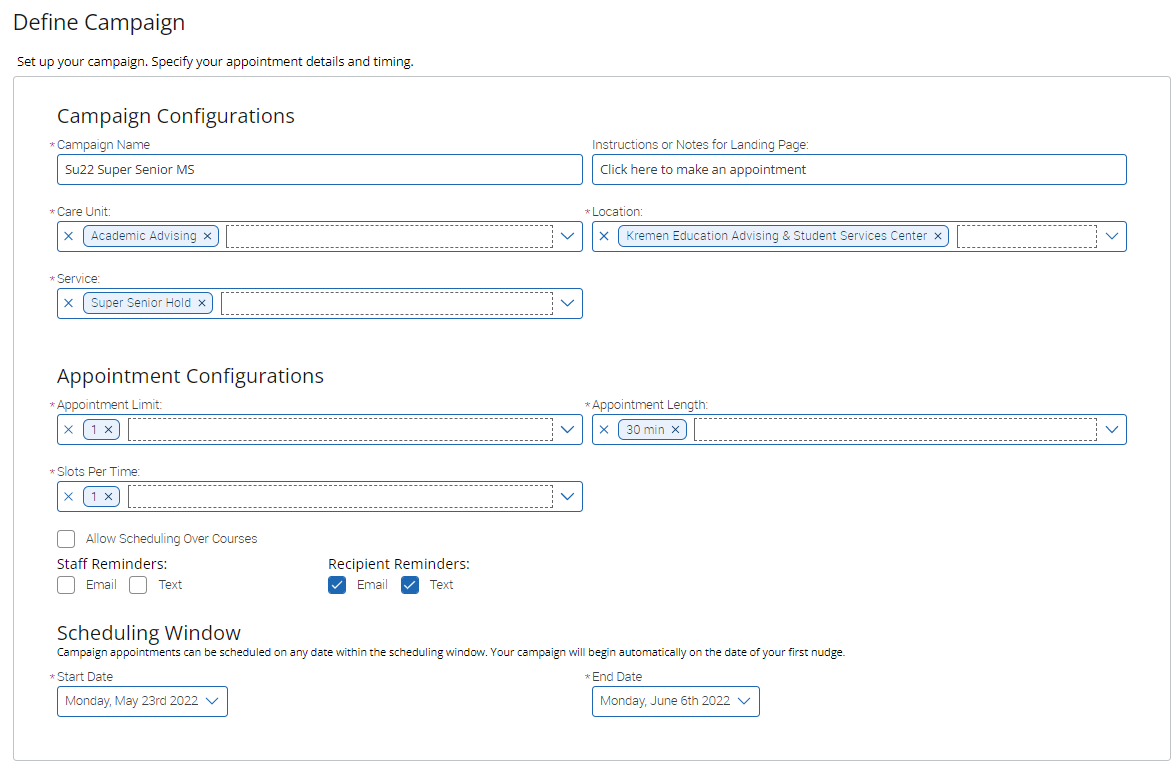
Campaign Name | Campaign Name is visible to the person creating the campaign and any other users who have access to view campaigns, but not visible to the student. Make sure that you adhere to your institution’s naming policy, otherwise, other users will not be able to evaluate the impact of your campaigns. | ||
Our formats include: Examples:
| |||
Instructions of Notes for Landing Page | This field shows instructions for the campaign the student sees when they open the Appointment Campaign notification. Make this text short and descriptive. | ||
Care Unit | The Care Unit the Appointment Campaign is associated with. | ||
Location | The location where the appointments will be held. | ||
Service | The Student Service associated with the campaign. | ||
Course or Reason | The reason or associated course for the campaign here. This only appears if the Service is tied to a course. | ||
Appointment Limit | How many appointments you want students to schedule during the campaign. | ||
Appointment Length | How long the campaign appointment will be. Durations begin at a 5 minute length. | ||
Slots per Time | Appointments can be individual or group. By adding more than one "slot per time", you can have a group appointment. | ||
Allow Scheduling Over Courses | If checked, this box lets students schedule over course conflicts. Course conflicts refers to time slots where either the potential organizer or the student have conflicts due to either instructions or enrollments. | ||
Staff Reminders | These checkboxes select what kinds of Appointment Campaign notifications the staff attached to the campaign will receive. The two options are Email and Text. | ||
Recipient Reminders | These checkboxes select what kinds of Appointment Campaign notifications the campaign recipients (usually students) will receive. The two options are Email and Text. | ||
Start and End Date | The date range that you want students make campaign appointments for. | ||
Add Students to Campaign
After entering the details on the Define Campaign page, click Continue
Your next step is adding students. If you created this campaign directly from a Student List or Saved Search, you are asked to review your students. If not, an Advanced Search opens.
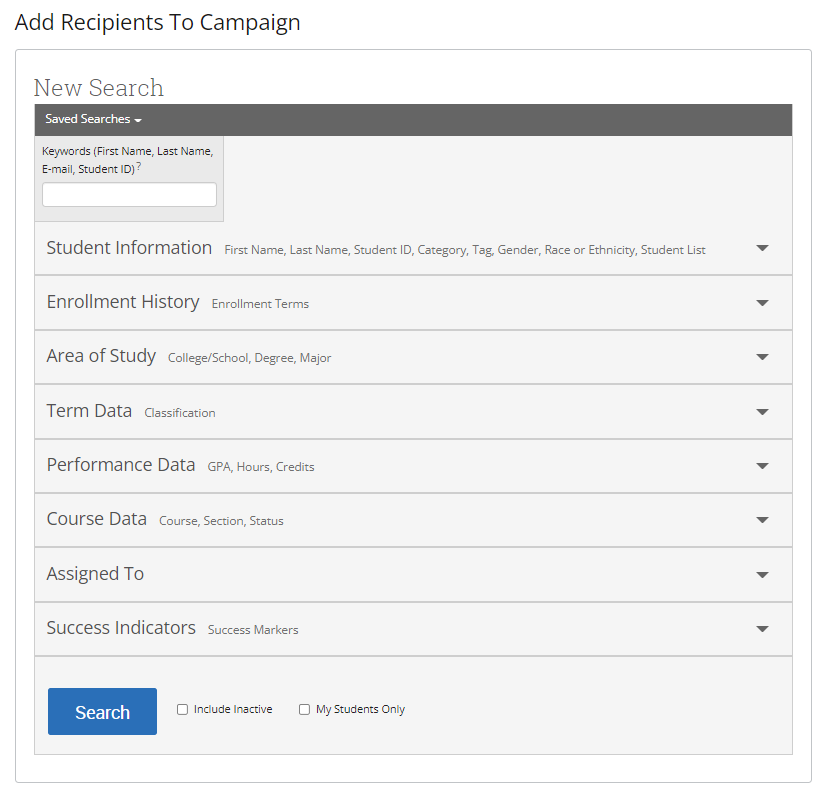
You have several ways to search for and select your students. You can add all students assigned to you to a campaign using the Invite All My Assigned Students option. The other option is an Advanced Search to use Advanced Search filters to find and select students.
After starting the search, you are presented with a list of students. Select the students you wish to add and then choose Add Selected Users and Search for More from the actions menu.
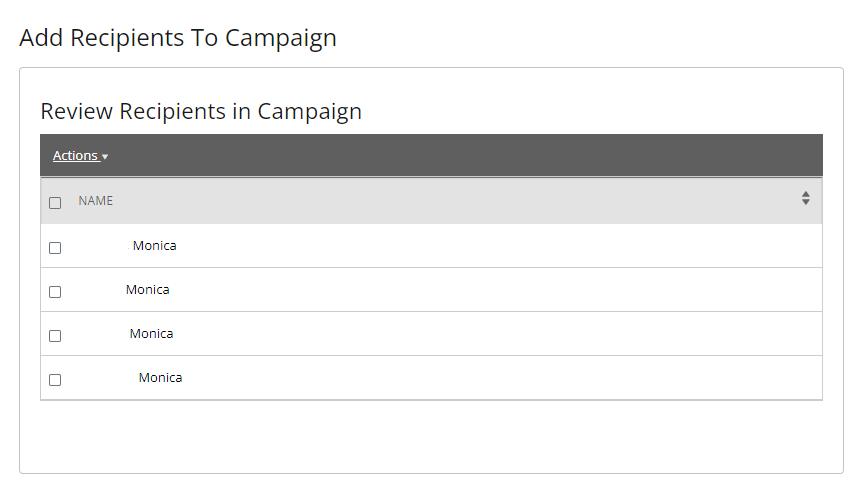
You can remove students from the campaign if needed. For example, if you met with one of the students already and don't need them to come in during the campaign period, they can be removed.
Once finished, click Continue to move to the next page. You are asked to review the students in the campaign. If these are correct, click Continue.
Add Staff to Campaign
Next, you need to choose Organizers for the campaign. You must select yourself or additional staff to make them available for appointments based on your role permissions.
| Info |
|---|
Important. Staff must have availability defined before they can be added to an Appointment Campaign. If you do not see staff you expected to have availability, make sure their calendars and availability are up-to-date. |
If your school does not use Campaign Availabilities, select the Include Appointment Availabilities options to show available advisors.
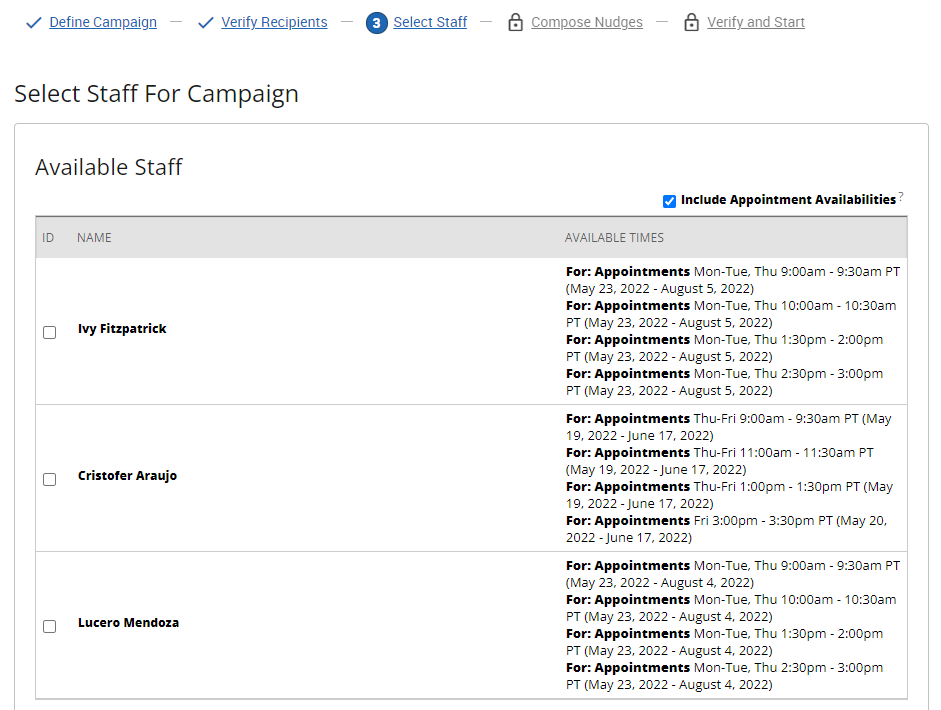
Add staff to the campaign and click Continue.
Add Nudges and Success Message
Nudges replace the Compose a Message functionality and allow for more communication from your school to students during an Appointment Campaign. Each nudge is an email sent to your campaign list. You can customize the message sent to the student; however, the link and link text will always be the URL and text set in the first step of the Appointment Campaign.
Nudge emails are sent the morning of the date chosen when you create the nudge. As with any email, some may be slightly delayed.
To create a nudge, define your campaign and create your list of students for the Appointment Campaign. The Nudges page opens.
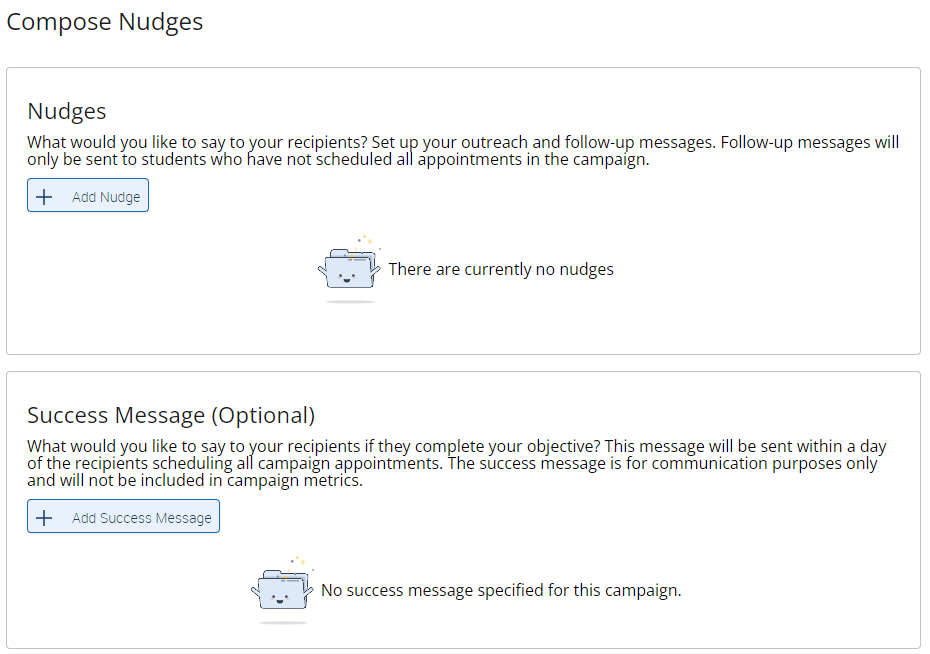
Click Add Nudge to create your first nudge. You must create at least one nudge per campaign; however, you can create more. There are no limits on how many nudges you can send.
| Note |
|---|
Warning. Do not remove the schedule link from the email body. |
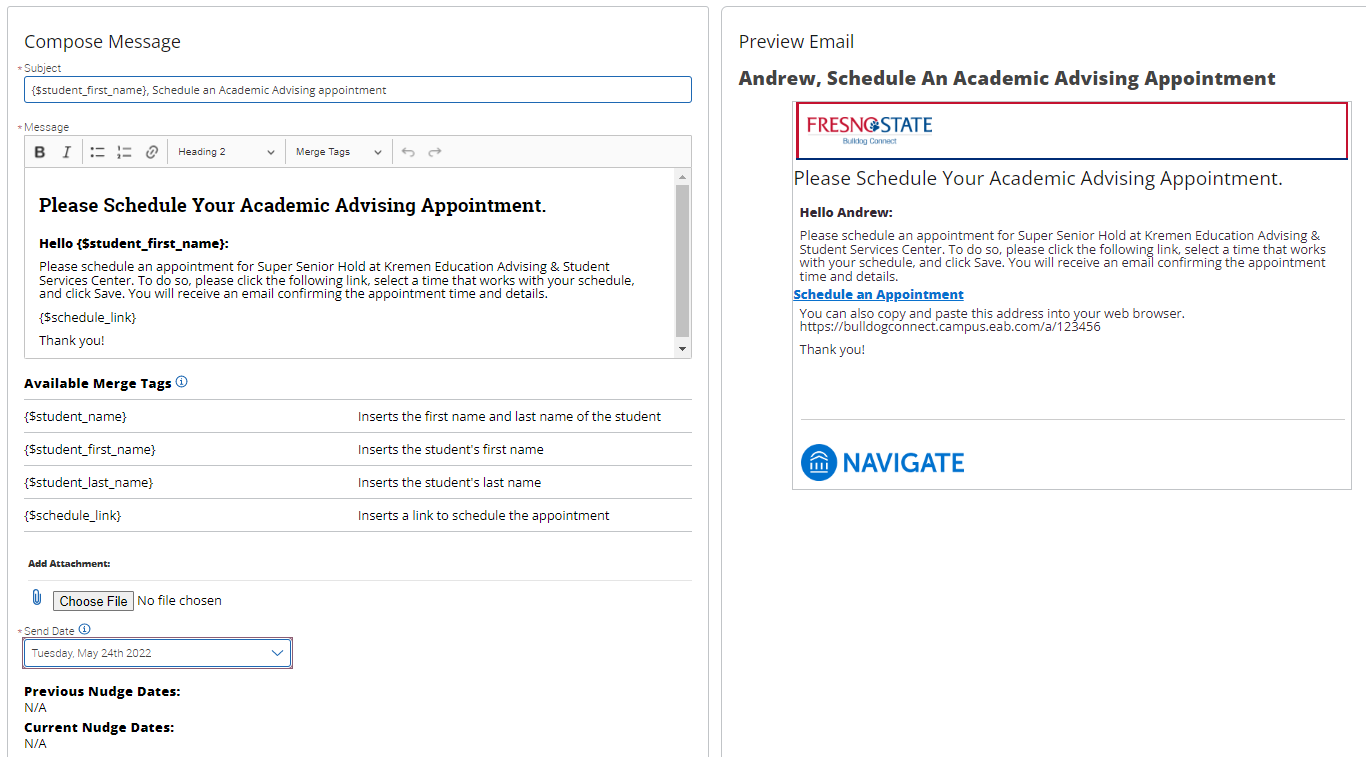
Enter a subject line and customize the message. The available Merge Tags are listed under the Message text box. You can see a preview of the message in a panel right of the composition panel. You can also attach a file to this message.
Fields used in the message composition are:
Email Subject | The subject of the nudge email going to the student. It is Enroll Today by default. |
|---|---|
Message | The customized email message going to the student. Merge tags are available for this message and are shown beneath the message field. |
Send Date | The date the email nudge is sent. The nudge with the earliest date will essentially start your Enrollment Campaign. |
After creating a nudge, click Save Nudge to continue. You may continue creating nudges after this.
You can also create a Success Message on the Nudges step of an Appointment Campaign. This is an email sent the day after the recipient schedules all appointments for the campaign. It is for communication purposes only. Click Add Success Message to start creating a Success Message.
The Add Success Message page is like the Add Nudge page; however, there is no Send Date because the Success Message is only sent after the student schedules an appointment. You may also use merge tags when writing your Success Message.
After you have finished composing your message, it's time to send out your campaign!
Confirm and Send
Review your campaign details, nudges, invitees, and advisors on this page.
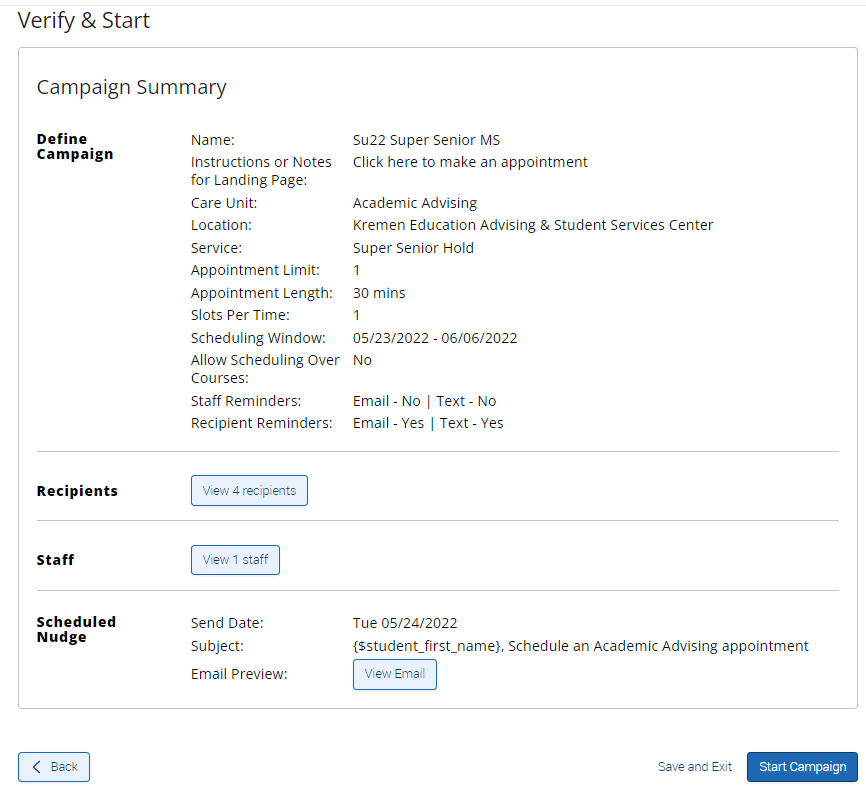
Click Start Campaign when you are ready to email the invites to the selected students.
Managing an Appointment Campaign
Once you have created and sent your campaign, we give you the tools to manage it. Open the Campaigns page and select the Appointment Campaignslink. There, you see three at-a-glance statistics for an active campaign, explained below:
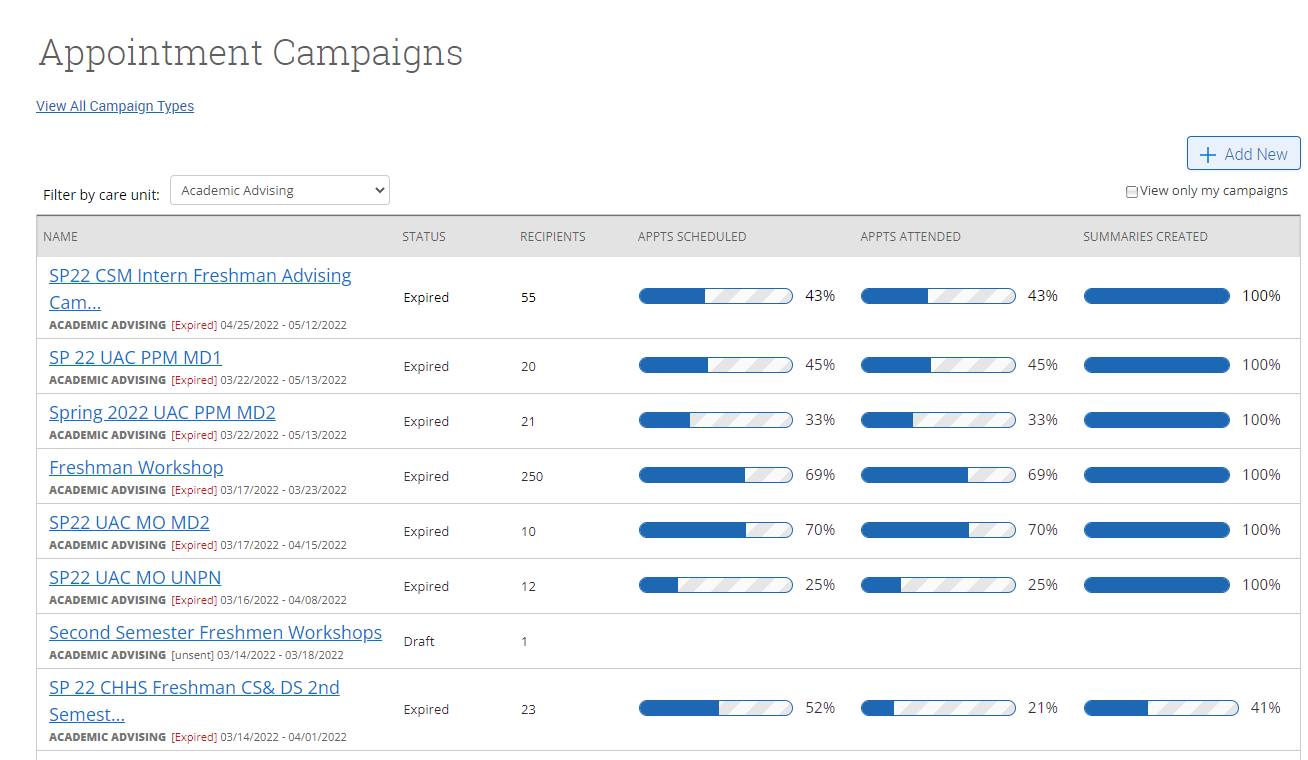
On the Appointment Campaigns tab, you see three at-a-glance statistics if the campaign is active: Appointments Scheduled, Appointments Attended, and Summaries Created.
Appointments Scheduled | Percentage of appointments scheduled from list of invitees. |
Appointments Attended | Calculated by taking the ratio of the number of unique attendance records of who attend the appointment made using the invitation ID or count of kiosk visits associated with the users divided by the total number of Appointment Invitations in the campaign. |
Summaries Created | Of the scheduled appointments, the percentage of Appointment Summaries filed. |
Note. Unique Attendance means the attended checkbox was selected in the Appointment Summary. A group appointment only counts as one attendance.
For even more details, select an Appointment Campaign by selecting its name. The Appointment Campaigns page lets you edit or delete the campaign or export the student list. It shows key metrics about the campaign and the settings for the campaign. You also get more information about the campaign on the four tabs.
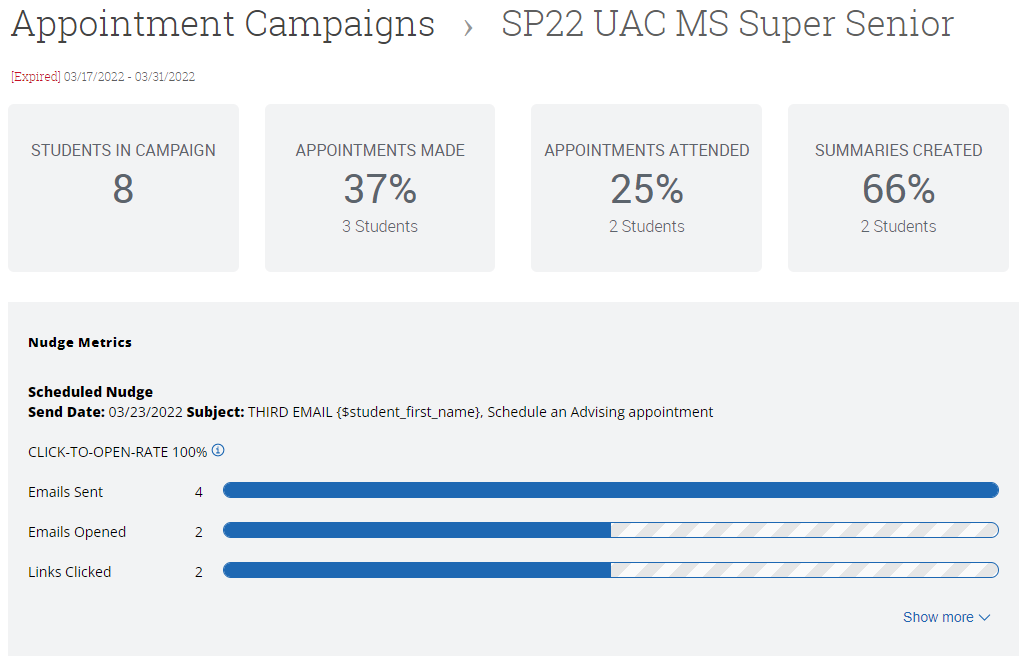
Appointment Campaign Metrics
There are two sets of Appointment Campaign metrics for the campaigns - campaign metrics and metrics related to the campaign nudges. The campaign metrics reflect the metrics seen on the Appointment Campaign list; however, these metrics also show how many students make up the percentages. The Nudge Metrics sections show the Click-to-Open-Rate for campaign nudges. Additionally, it shows how many emails were sent, how many were opened, and how many links were clicked for a campaign.
Campaign Detail Tabs
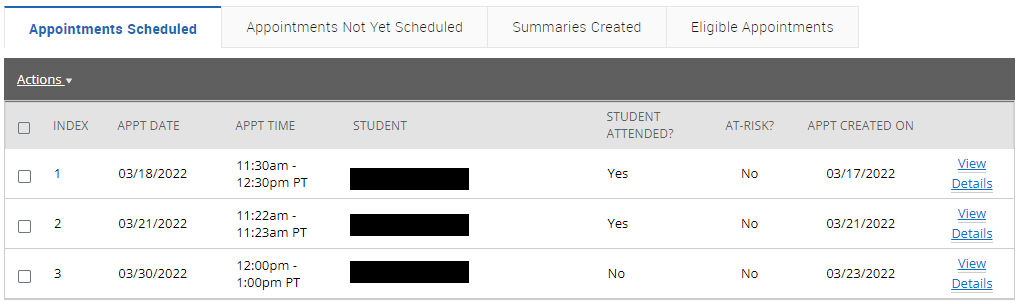
Appointments Scheduled
The Appointments Scheduled tab lets you see which specific students made appointments. You can open a student’s profile by selecting their name or choose to Send a Message and/or Add Note for the students you select from the list in the Actions menu.
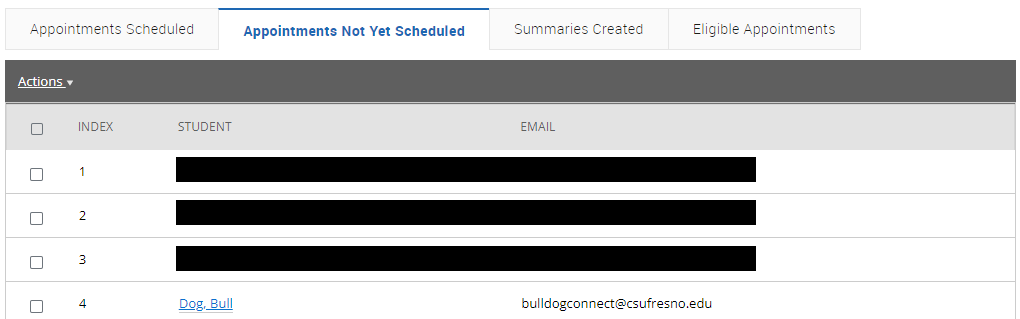
Appointments Not Yet Scheduled
The Appointments Not Yet Scheduled tab shows the specific students who have not yet made an appointment. Like the Appointments Scheduled tab, you can send students messages, add notes, or add tags. You can also resend the campaign email to these students.
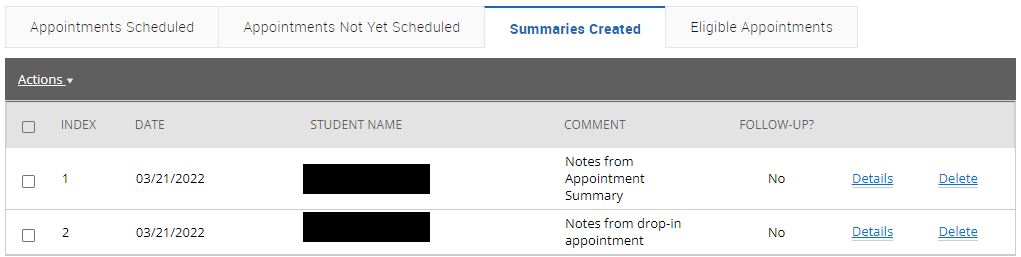
Summaries Created
The Summaries Created tab lists any Appointment Summary Reports from the campaign. From this tab, you can view the detailed report or delete the report.
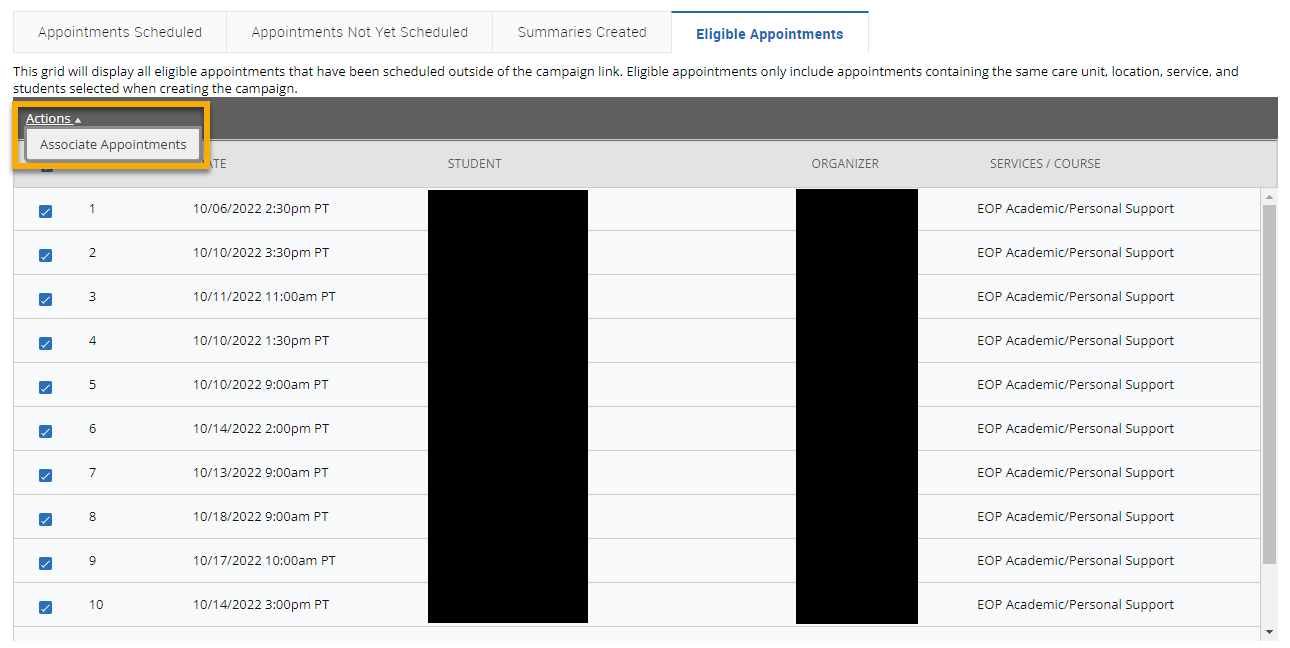
Eligible Appointments
This tab exists to associate appointments that should be counted toward the campaign metrics but were scheduled outside of the campaign link. For example, a student could be included in a campaign, but rather than making an appointment by scheduling the link in their email, instead, they called the Advising Center or dropped in. The Eligible Appointments tab allows an advisor or administrator to associate that student’s appointment with the campaign. Choose Associate Appointments from the Actions menu. The appointment is then associated with the campaign.
| Info |
|---|
Important. Appointments are only eligible if they have the exact same Location and Service as the Appointment Campaign. The student must also be on the campaign list. |
Appointment Campaign Options
This section lets you take action on your campaign.
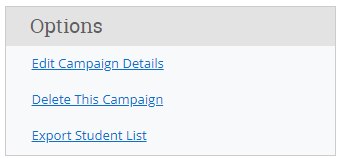
Edit Campaign Details | Use this option to edit anything except Care Unit, Service, and Location about the Appointment Campaign. When those changes have been saved, they automatically apply to all students who still are required to make an appointment. Students who have already created their appointments are not affected by the changes. |
Delete This Campaign | Use this option to delete an existing campaign. Deleting this campaign does not remove any student appointments that have already been scheduled. |
Export Student List | Use this option to export the list of students included in this campaign as a CSV file. |
Frequently Asked Questions
| Expand | ||
|---|---|---|
| ||
Yes to both. |
| Expand | ||
|---|---|---|
| ||
When a student cancels a campaign appointment in advance Bulldog Connect moves this student from the Appointments Made tab to the Appointments Not Yet Made tab. The platform also removes the canceled appointment from the advisor’s calendar so it's available to another campaign student. |
| Expand | ||
|---|---|---|
| ||
When you add students to a campaign that has already been sent, you should see an option to send to all or only send to newly added recipients before saving. |
| Expand | ||
|---|---|---|
| ||
In a campaign that allows for multiple appointments per student, a column appears on the Appointment Campaign dashboard on the Appointments Not Yet Made tab that shows how many appointments a student has made and how many more they have left to schedule. |
| Expand | ||
|---|---|---|
| ||
Appointment Campaigns override ALL settings at the location level EXCEPT the Number of Hours Ahead of Time Students are Allowed to Schedule an Appointment setting. |
| Expand | ||
|---|---|---|
| ||
No. Each appointment can only have one course associated with it. |
| Expand | ||
|---|---|---|
| ||
Appointment Campaign links are individual to each student, so you cannot forward them. |
| Expand | ||
|---|---|---|
| ||
Mark that student as a no-show as you would with any other type of appointment, by unclicking the This person attended checkbox in the Appointment Summary report. These students display as “no-shows” on the Appointment Campaign dashboard. Once marked as a no-show, the student can use the original appointment campaign link to schedule again within the campaign. |
| Expand | ||
|---|---|---|
| ||
If the STUDENT cancels for themselves, then the link should be active again. If the appointment is canceled for the staff member in the appointment, then the link does not go back to active. This is a known issue. |
| Expand | ||
|---|---|---|
| ||
Students will still receive the invitation. The platform doesn’t know to pull them out unless the advisor manually does so. It’s a good practice for advisors to manually remove them if they already have a booked appointment for the purpose of the campaign with specific students. If the advisor doesn’t send a clean list, they risk muddying their response rates and will have a harder time tracking the effectiveness of that particular campaign. However, an appointment will not show under the eligible appointments tab (even if the student has scheduled for the same advisor, service, and location) unless the student is also already in the campaign. |